Uncategorized
A vehicle can be freshly washed and still look tired. When the paint appears flat, cloudy, chalky, or hazy in direct sunlight, washing alone will not restore dull paint. The issue is usually sitting in or on the clear coat: bonded contamination, oxidation, fine scratches, water-spot etching, or residue left behind by improper products.
Florida vehicles face a tougher environment than most. Intense UV exposure, salt air, afternoon rain, hard-water spotting, road film, bug splatter, and frequent washing all take a visible toll. The right solution depends on what is actually dulling the finish. A professional inspection prevents the common mistake of using aggressive polishing on paint that only needs decontamination or, worse, using a harsh product on a failing clear coat.
Why Vehicle Paint Loses Its Gloss
Modern automotive paint is typically protected by a clear coat. This transparent layer creates the depth and reflection people associate with a well-kept vehicle. Over time, that surface develops tiny defects and contamination that scatter light rather than reflect it cleanly. The result is paint that looks gray, lifeless, or rough even after a wash.
Surface contamination is one of the most overlooked causes. Industrial fallout, brake dust, tree sap, overspray, mineral deposits, and embedded road grime can bond to the paint. You may feel it as a gritty texture after washing. This contamination blocks clarity and can eventually etch into the finish if left in place.
Swirl marks and fine scratches are another major factor. Automatic tunnel washes, dirty wash mitts, dry wiping, and abrasive towels can leave a network of light scratches across the clear coat. These are especially noticeable on black, dark blue, and other deep colors under the Florida sun.
Oxidation is different. It occurs when UV exposure and weather break down the uppermost portion of the paint or clear coat. Early oxidation can often be corrected. Severe oxidation, peeling clear coat, and widespread paint failure cannot be polished away. Knowing the difference is essential before any restoration work begins.
Start With the Right Diagnosis
The best way to restore dull paint is not to reach for the strongest compound. It is to identify the condition of the paint and use the least aggressive process that can produce a meaningful improvement.
A careful assessment starts after the vehicle has been thoroughly cleaned. The paint should be inspected in natural light and under focused detailing lights. This reveals whether the dullness is caused by contamination, shallow defects, oxidation, etched water spots, or clear-coat failure.
A simple touch test is useful. After washing, lightly glide a clean hand across the paint while it is still protected by a thin plastic bag or detailer-safe barrier. If the surface feels rough, bonded contamination is likely present. If it feels smooth but looks hazy under direct light, polishing may be needed.
Paint thickness also matters, particularly on older vehicles, repainted panels, and vehicles that have been polished repeatedly. Professional detailers use paint-depth readings to make informed correction decisions. There is only so much clear coat available to work with, and preserving it should always take priority over chasing a perfect finish.
When Dullness Is Actually Clear-Coat Failure
No amount of wax, compound, or ceramic coating can repair a clear coat that is peeling, cracking, or separating from the color coat. If the finish has white patches, flaking edges, or a blotchy appearance that does not improve when wet, repainting may be the appropriate solution.
This is a critical trade-off. Polishing damaged clear coat can temporarily alter its appearance, but it cannot restore structural integrity. An honest recommendation protects both the vehicle and the owner’s investment.
The Professional Process to Restore Dull Paint
Professional paint restoration is a controlled sequence, not a single product. Each step prepares the surface for the next and reduces the chance of creating new defects.
1. Safe Wash and Chemical Decontamination
The process begins with a thorough, pH-balanced wash designed to remove loose dirt, traffic film, bugs, and surface grime without unnecessarily stripping the finish. Wheels, lower panels, badges, trim, and tight areas need attention because contamination from these areas can transfer back onto the paint during later steps.
A chemical decontamination treatment can dissolve embedded iron particles and other fallout that normal shampoo cannot remove. On many vehicles, this is the first point where the paint begins to look clearer. It removes the invisible buildup that dulls reflection and contributes to roughness.
2. Mechanical Decontamination
If the paint still feels rough after chemical treatment, a clay bar or synthetic clay media may be used with the correct lubricant. This safely lifts bonded contamination from the clear coat so polishing pads can move smoothly and evenly.
Mechanical decontamination is effective, but it must be performed carefully. Poor technique can mar the paint and create more work during the correction stage. It is not something to rush with an old clay bar, insufficient lubrication, or a contaminated towel.
3. Test Spot and Paint Correction
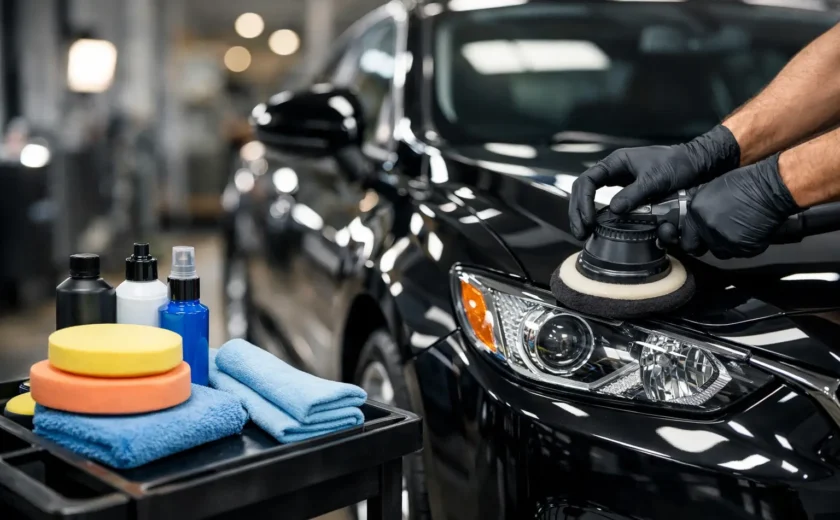
Before correcting an entire vehicle, a detailer should create a test spot on a representative panel. This determines the right pad, machine, polish, and number of passes needed to improve clarity without removing more clear coat than necessary.
For lightly dull paint, a one-step polish may be enough to reduce mild swirls, improve gloss, and restore crisp reflections. More neglected paint may need a multi-stage correction, beginning with a compound to address deeper defects and followed by a finishing polish to refine the surface.
The goal is improvement with restraint. Some deep scratches, chips, and etching may remain because safely removing them would require excessive clear-coat removal. A high-quality correction should make the finish look dramatically cleaner, deeper, and more uniform while preserving paint for the future.
4. Panel Preparation and Protection
Once correction is complete, polishing oils and residue must be removed so the protection can bond properly. This step is often skipped in quick-detailing work, but it directly affects durability and the clarity of the final result.
Protection should match the vehicle, its storage conditions, and the owner’s maintenance habits. A premium sealant or wax can provide warmth and water behavior for drivers who enjoy regular upkeep. A ceramic coating offers longer-term chemical resistance, easier washing, stronger gloss retention, and valuable protection from everyday environmental exposure.
Ceramic coating is not a force field. It will not stop rock chips, prevent every scratch, or eliminate the need for hand washing. For high-impact areas such as bumpers, hoods, mirrors, and rocker panels, paint protection film provides a different kind of defense by helping absorb physical road damage. The best choice depends on how the vehicle is driven and what type of risk matters most.
Avoid the Shortcuts That Make Paint Look Worse
Many products promise instant shine, but some only mask the problem. Heavy glazes and oily dressings can fill fine scratches for a short time, then wash away and reveal the same dullness underneath. They may be acceptable for a temporary presentation, but they are not a substitute for correction.
Avoid aggressive compounds unless there is a clear reason to use them. Hand rubbing with a harsh compound, polishing in direct heat, or using an inexpensive buffer without proper pad control can haze the paint, create uneven results, or burn edges and body lines. Dark vehicles and softer clear coats are especially unforgiving.
Household cleaners, dish soap, and abrasive brushes should stay away from automotive paint. They can strip protection, dry out trim, and add scratches that make the finish appear even duller. The same goes for wiping dust from a dry vehicle. Dust may look harmless, but dragging it across the clear coat creates friction marks.
Keeping the Restored Finish Looking Its Best
After professional correction, maintenance determines how long the improvement remains visible. Wash the vehicle regularly with clean tools, a paint-safe shampoo, and proper drying towels. The goal is to remove contaminants before they have time to bond or etch.
Parking in a garage or under cover whenever practical makes a real difference in Florida. If outdoor parking is unavoidable, routine maintenance becomes more important. Remove bird droppings, bugs, and tree sap promptly, since these contaminants can damage a hot clear coat surprisingly quickly.
For ceramic-coated vehicles, use coating-safe wash products and avoid automatic brushes. Periodic decontamination and maintenance inspections help preserve water behavior, gloss, and the coating’s ability to release grime. A coating performs best when it is maintained, not ignored.
At Diamond Detailing, paint restoration is approached as both a cosmetic improvement and a preservation service. The visible transformation matters, but so does choosing a process that respects the condition and remaining life of the vehicle’s finish.
A properly restored vehicle should not merely look shiny from across the parking lot. Up close, the paint should feel smooth, reflect cleanly, and carry protection suited to the way you drive it. That is the standard worth maintaining long after the first polished panel catches the light.